Industry News
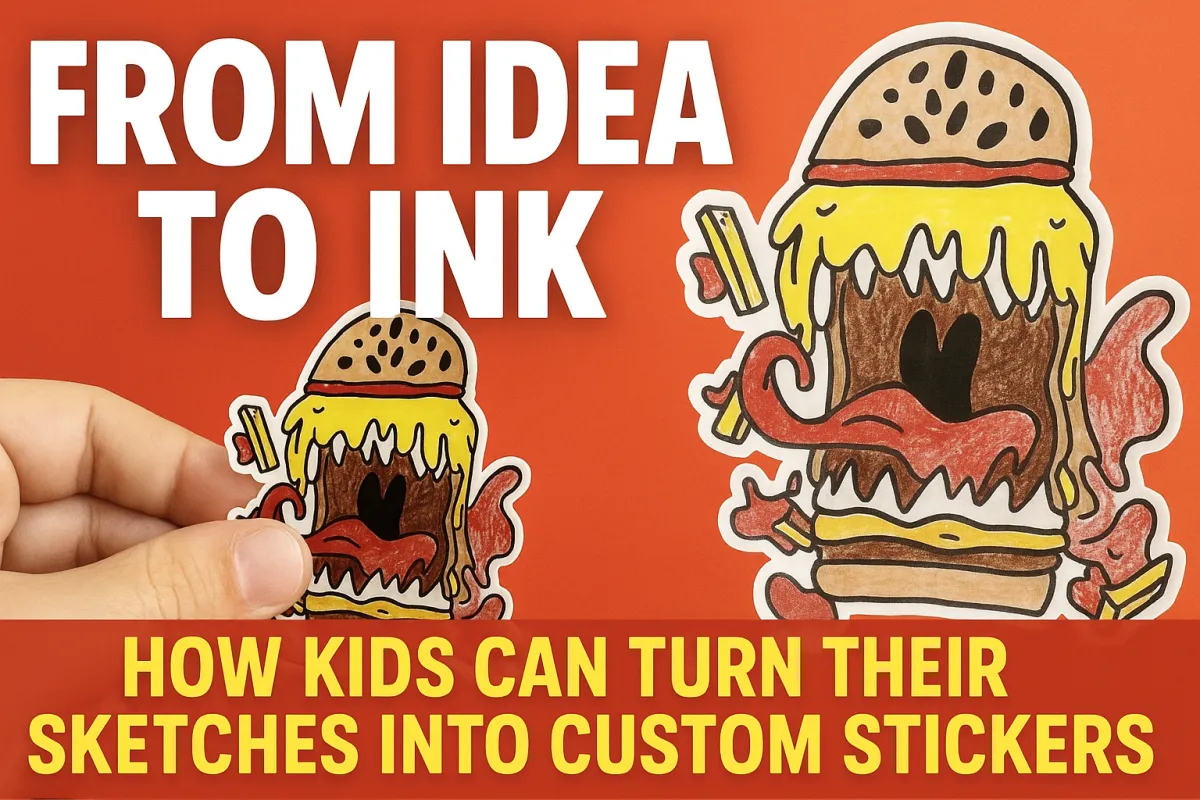
How Kids Can Turn Their Sketches Into Custom Stickers

From Idea to Ink: How Kids Can Turn Their Sketches Into Custom Stickers
Every great sticker starts with a spark of imagination—maybe it’s a sketch of a friendly monster, a rainbow robot, or your pet wearing sunglasses. For kids, those doodles and drawings are more than just scribbles on paper—they’re stories, characters, and expressions of who they are. What if you could take that art and turn it into a real sticker? Something you can hold, stick on your water bottle, or share with friends?
Good news—you totally can!
And it’s way easier (and more fun) than you might think. In this blog, we’ll walk through a simple, step-by-step process to turn kids' drawings into personalized stickers using digital tools and print services—even if you’ve never done it before!
Step 1: Start With a Drawing You Love
It all begins with a sketch. Grab some paper and markers, crayons, or pencils, and start drawing. Encourage your child to think about:
What makes them happy?
What characters or creatures live in their imagination?
What do they wish they had a sticker of?
Tip: Bold lines and simple shapes work best, especially if you want the design to stand out when it’s shrunken down to sticker size.
Step 2: Take a Clear Photo or Scan It
Once your child’s drawing is done, it’s time to get it into digital form. You can do this by:
Taking a clear photo with a phone or tablet. Use natural light and make sure there are no shadows.
Using a scanner if you want higher resolution.
Try to keep the background as clean and white as possible—this will make it easier to remove later.
Step 3: Clean Up the Image (Optional But Awesome!)
To get your sticker looking super polished, use a free app or software to clean up the image:
Remove the background using tools like remove.bg or Canva’s background remover.
Adjust brightness/contrast to make colors pop.
Crop or erase edges for cleaner outlines.
Pro Tip: If you’re using an iPad, apps like Procreate or Canva are great for tracing or enhancing the drawing digitally.
Step 4: Add a Sticker Outline (a.k.a. a “Cut Line”)
A sticker outline is the border that goes around your design. It’s what makes your sticker easy to peel and gives it that classic sticker look. You can:
Add a white or colored border around the image in Canva, Procreate, or even in a Word doc using image formatting tools.
Leave the drawing as-is if you prefer a clean edge.
Make sure the outline has enough space around the art (usually 1/8" or 3mm) to help with cutting accuracy.
Step 5: Choose a Printing Method
Now the magic part—turning your design into real stickers!
Option 1: Print-at-Home Stickers
Use sticker paper from brands like Avery or OnlineLabels.
Print using an inkjet or laser printer.
Cut by hand with scissors or a craft cutter (or use a Cricut if you have one!).
Option 2: Order from a Print Service
Sites like:
Printful
let you upload your design and choose size, finish (matte or glossy), and quantity.
Most services don’t require minimum orders, so it’s perfect for making a few just for fun!
Step 6: Stick, Share, and Shine!
Once your stickers arrive (or you print them), it’s time to decorate!
Add them to water bottles, notebooks, skateboards, or tablets.
Trade with friends or use them as party favors.
Create a sticker album or collage of original art.
Bonus: Turn this into a mini business! Kids can design sticker packs and sell them at school events, markets, or online with parent help. It’s a creative, confidence-building way to learn entrepreneurship and value their own ideas.
Why Stickers Are So Much More Than Just Art
This isn’t just about making a cute sticker—it’s about helping kids see their imagination come to life. It builds:
Creative confidence
Ownership of their ideas
Digital literacy
A sense of pride and accomplishment
Best of all, it creates tangible memories—something your child can hold and say, “I made this.”
Final Thoughts: From Crayon to Cool Sticker
Turning kids’ artwork into stickers is a creative adventure packed with learning, joy, and self-expression. Whether you’re doing it for fun, a school project, or as a new family hobby, this process shows kids that their ideas are valuable—and that with a little tech and a lot of heart, their creativity can stick around for a long time.
Ready to get started? Grab those crayons, open up your favorite art app, and let the sticker magic begin!
© Copyright 2023. Mandi St. Onge. All rights reserved.
